Hello Friends,
In this tutorial,we will learn how to create Soap based Web Services in Java language.

Before we deep dive into that,let us understand what Web Service is actually.
Web Service = Web + Service
Web Service as its name implies is service provided over web.
After this definition, immediate question that comes to mind is that we have lot of web sites available which provides services to its clients/users over web,so are all these web sites which provides services over web/Internet are Web Services?
Answer is NO.
Web services are created to be consumed by the applications i.e. there will be some application code which will call(consume) web service(some method of web service) to use the functionality of the web service.
Example : Say I have my web application and on the home page of my application,I want to display Weather conditions(Temperature) ,then I can call web service which expose operation(method) to fetch Weather specific data from my web application and display the data on my web application.
Web applications are for human consumption via browser.
Example : Facebook,LinkedIn,Yahoo.
Let us see below steps to create Soap based web Service :
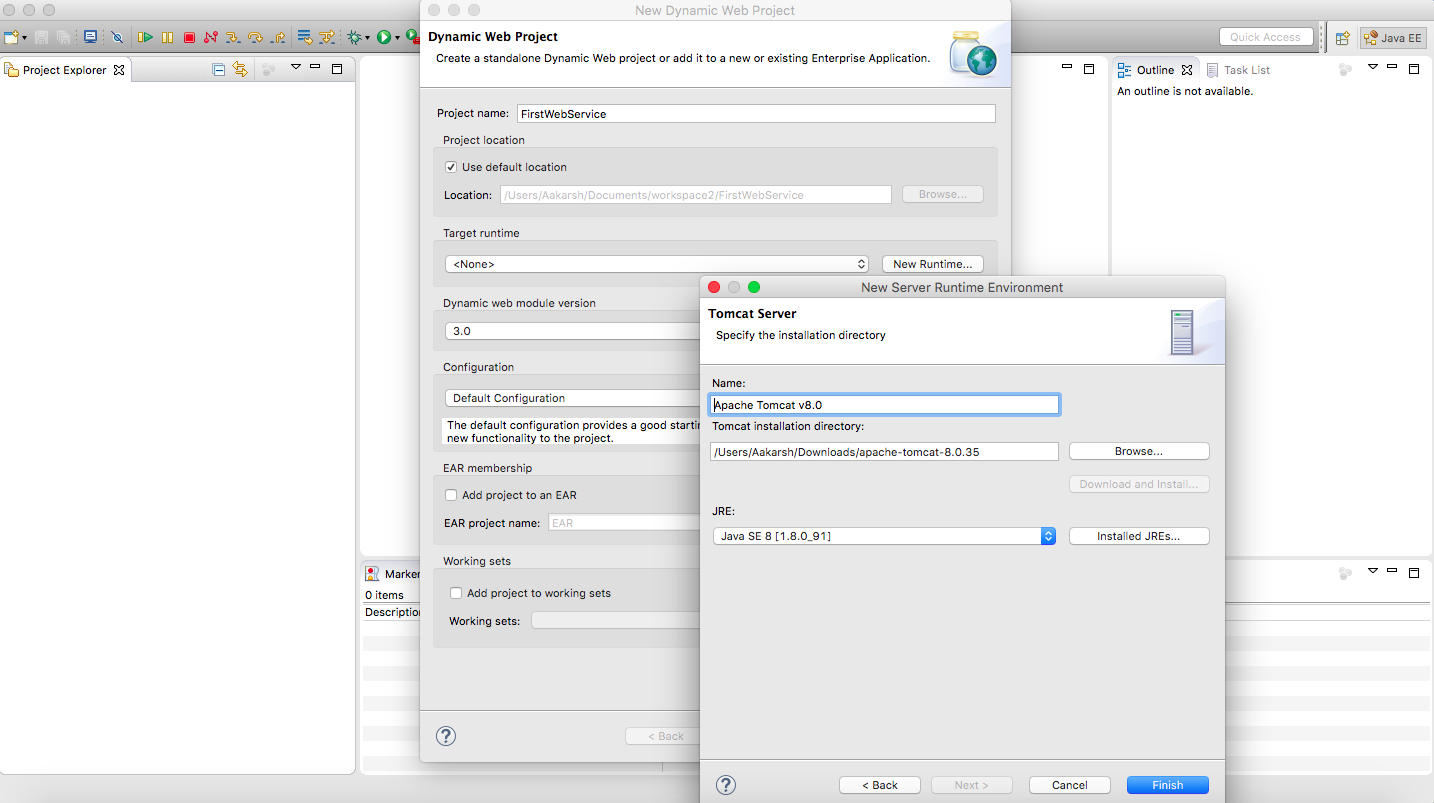
1) Create dynamic Web Project in Eclipse by right clicking in Project explorer and then select New-> Dynamic Web Project

2)
2.1) Give any name to project ,for example "FirstWebService".
2.2) Select Target Runtime as Apache Tomcat v8.0.
Note : You can use some other version of Tomcat as well or some other Servlet container as well.
2.3) Click Finish.
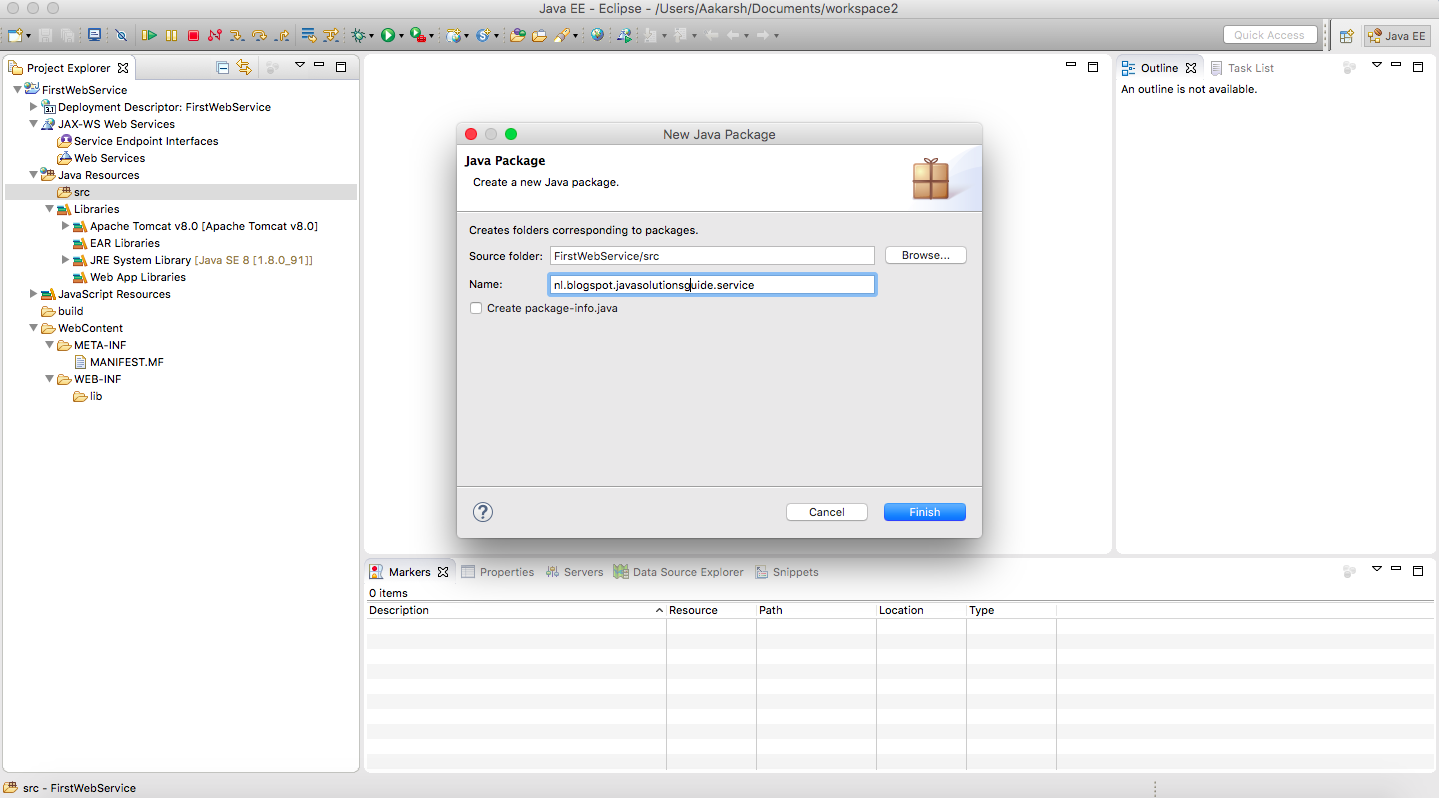
3) Below is how project structure will look like in Eclipse.

4)
4.1 Create a package within src folder with name nl.blogspot.javasolutionsguide.service by right clicking on src folder and then select New -> Package.

4.2 Within this package create a interface with name CalculatorService by right clicking on package name and then selecting New-> Interface
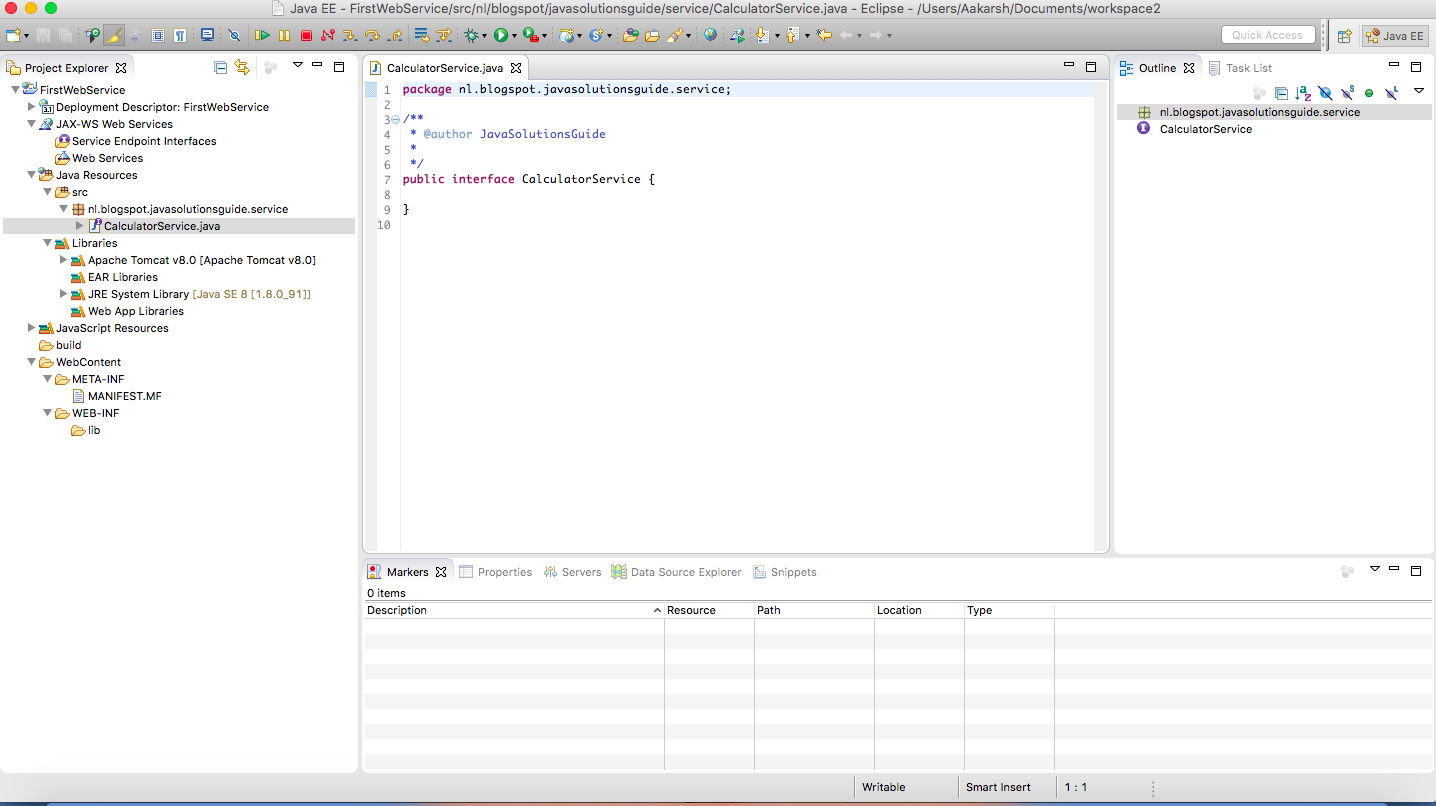
4.3 Add methods in CalculatorService ,which will be the operations exposed by this web service or in other words these will be the operations which client/consumer of this web service can expect from this web service.

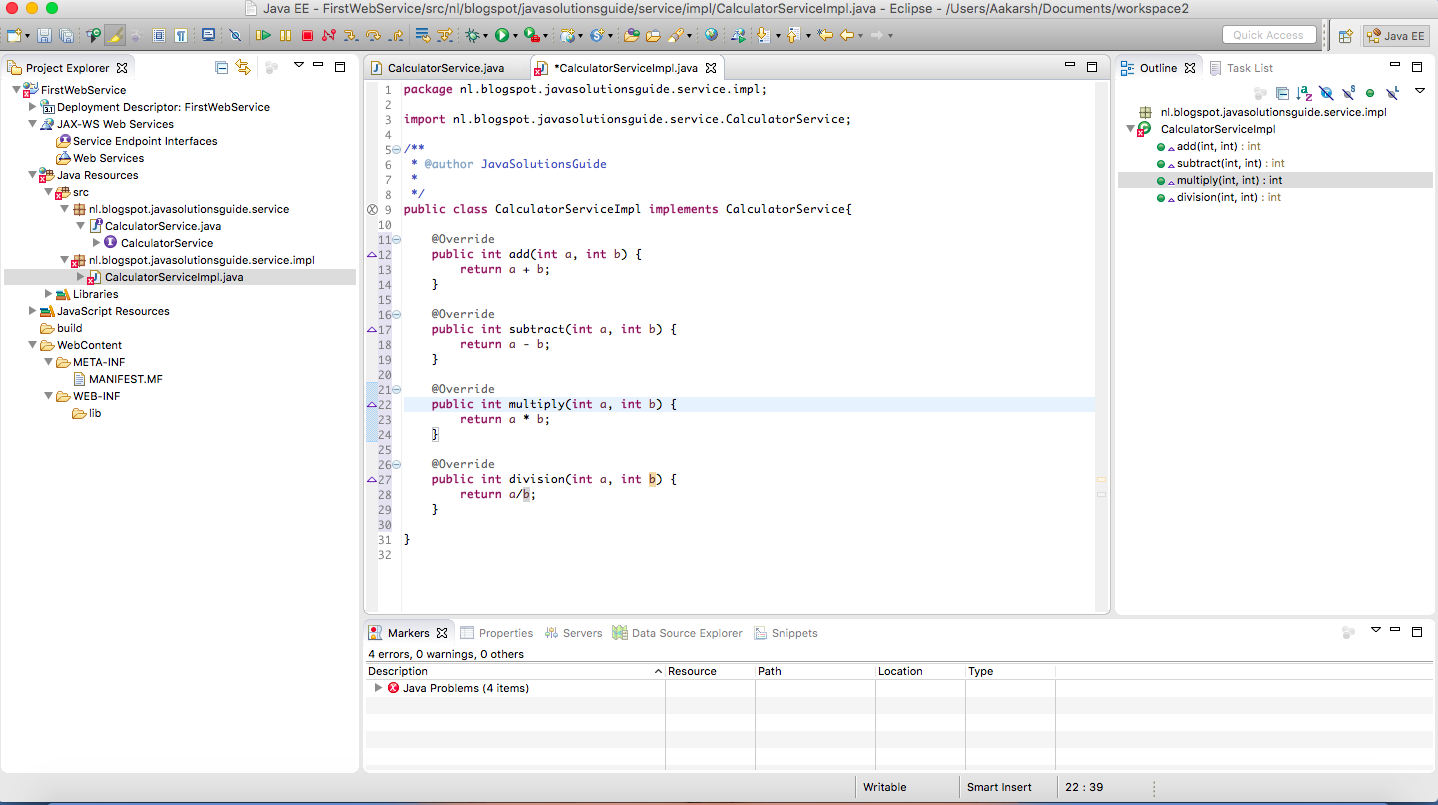
4.3 Create another package within src folder with name nl.blogspot.javasolutionsguide.service.impl
4.4 Create class with name CalculatorServiceImpl which should implement CalculatorService interface.
5) Right click on CalculatorServiceImpl file and select Web Services -> Create Web Services

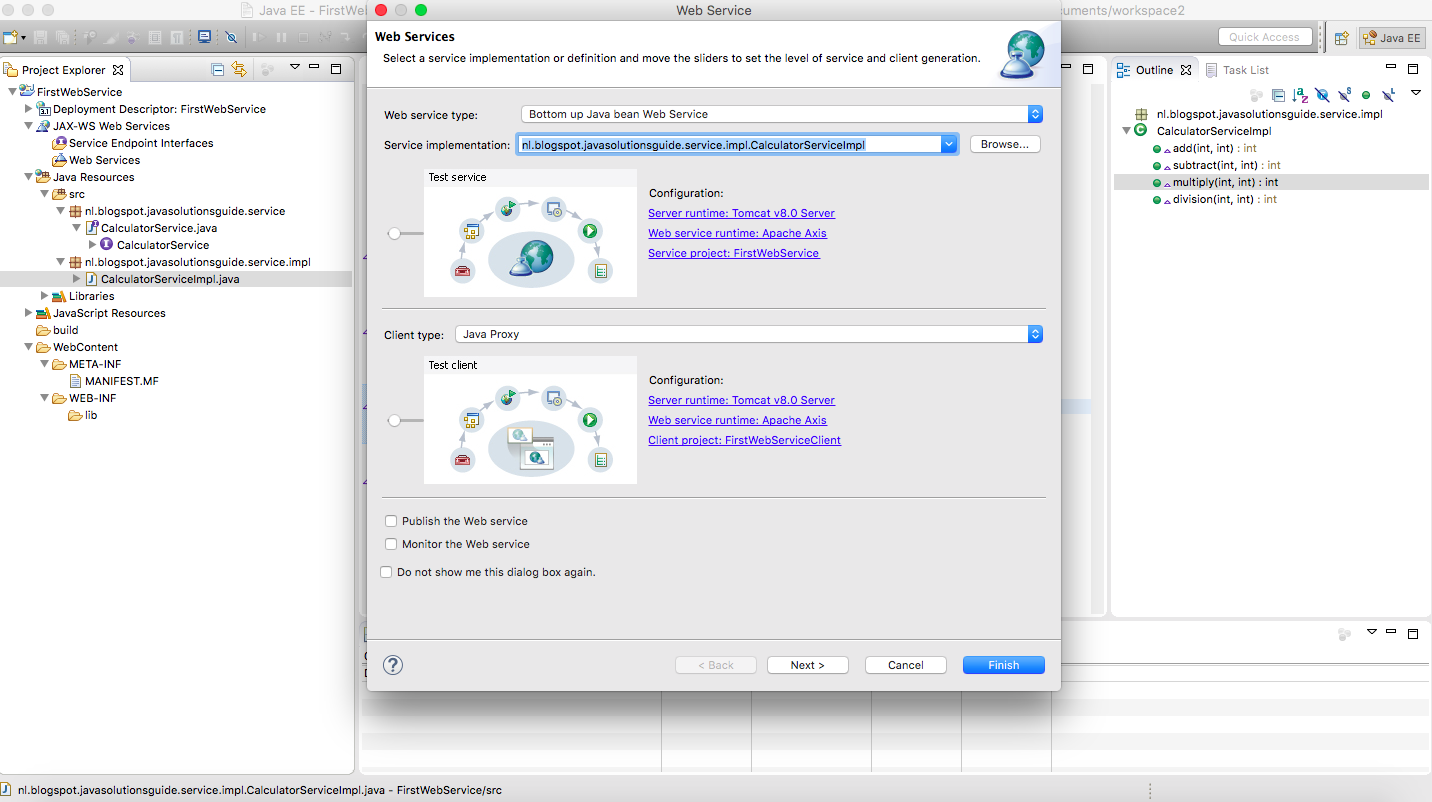
6) You will see following wizard.
As you can see,in the "web service type",we have chosen "Bottom up Java bean Web Service",which means we will create Java code having implementation first and from that we will generate contract i.e. WSDL,which then can be shared with consumer of the web service.In another approach which is "Top down Java bean Web Service" approach ,first WSDL is created and then Implementation is created.
In the Service Implementation,give the name of CalculatorServiceImpl class which we created above.
Also make sure that In the web Service section and Client type section,slider is completely on left ,which means we want to get all steps performed for web service from Develop Service -> Assemble Service -> Deploy Service ->Install Service ->Test Service and all following steps for web service client from Develop Client -> Assemble Client -> Deploy Client -> Install Client-> Start Client ->Test Client.
Click Next.
9) You can see message "Currently server is started" in below screen now. Click on Finish.

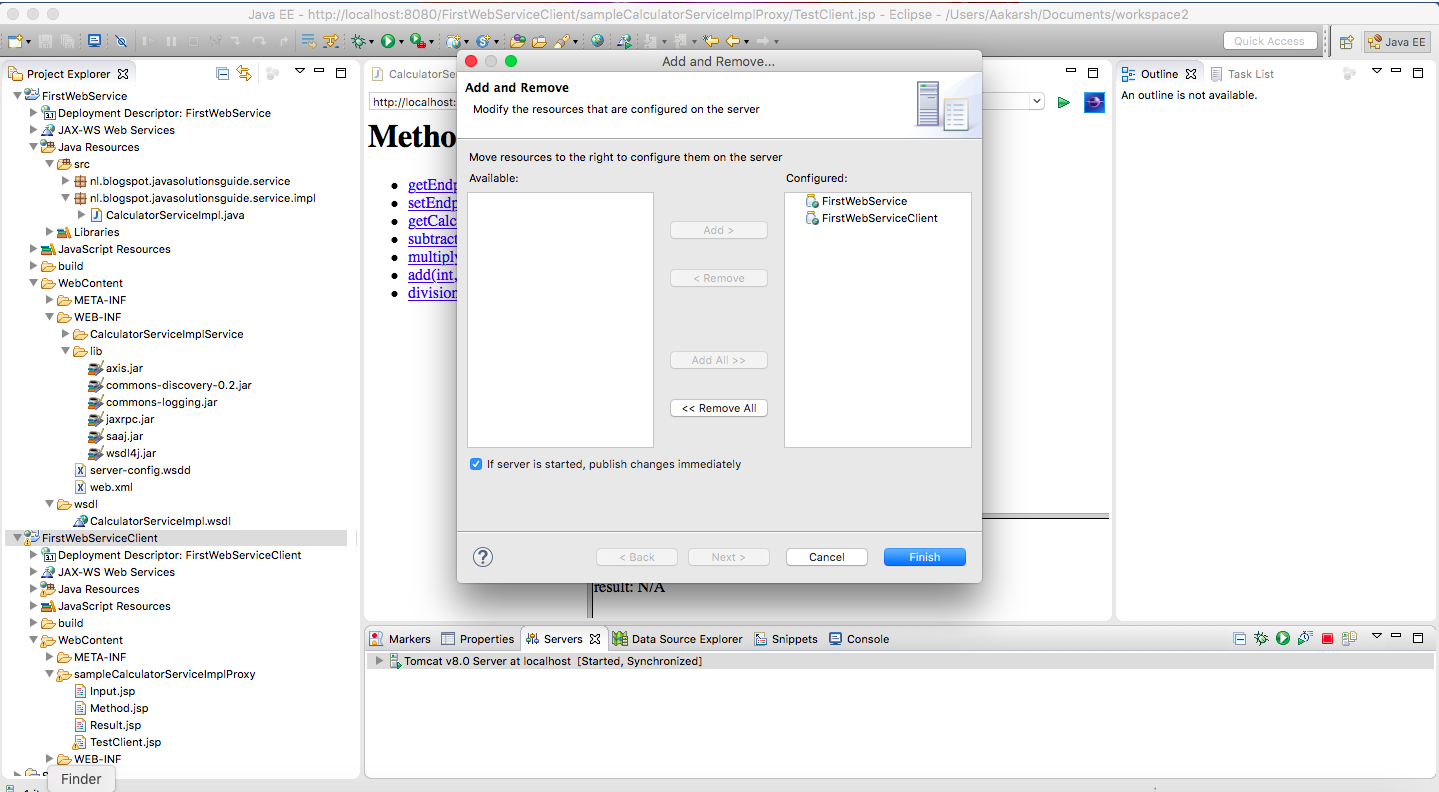
10).As you can see in below screenshot,a new Web Service Client project with name "FirstWebServiceClient" has been automatically created(because in Client type section in step 6 ,we had moved slider to left most ,which means we want to get client created automatically (to test web service using that client) and deployed on Tomcat server along with Web service "FirstWebService".
and as we moved slider till "Test Client" in step 6 ,browser with TestClient.jsp from Client project "FirstWebServiceClient" is opened to test Web Service,as can be seen in below screenshot.

11)Also You will see that eclipse has added WSDL,Axis and few more jars.Here Axis is nothing but one of the implementation of java Web Services specifications.
Now What is this WSDL.
WSDL stands for Web Service Description Language.
As its name implies,this file describes web service.It tells what all methods are there in web service (calculatorServiceImpl class in our case) and what type of input parameters they expect and what are there return types.
The Service creator needs to share this WSDL to service consumer,so that service consumer will get to know which methods of service can be called and what type of input parameter consumer needs to send and what return type they can expect.Accordingly consumer will call service methods of exposed web service.Here for example purpose,we have created both Web Service and Consumer,but in real life ,normally ,we will either be provider or consumer of the web service at a time.
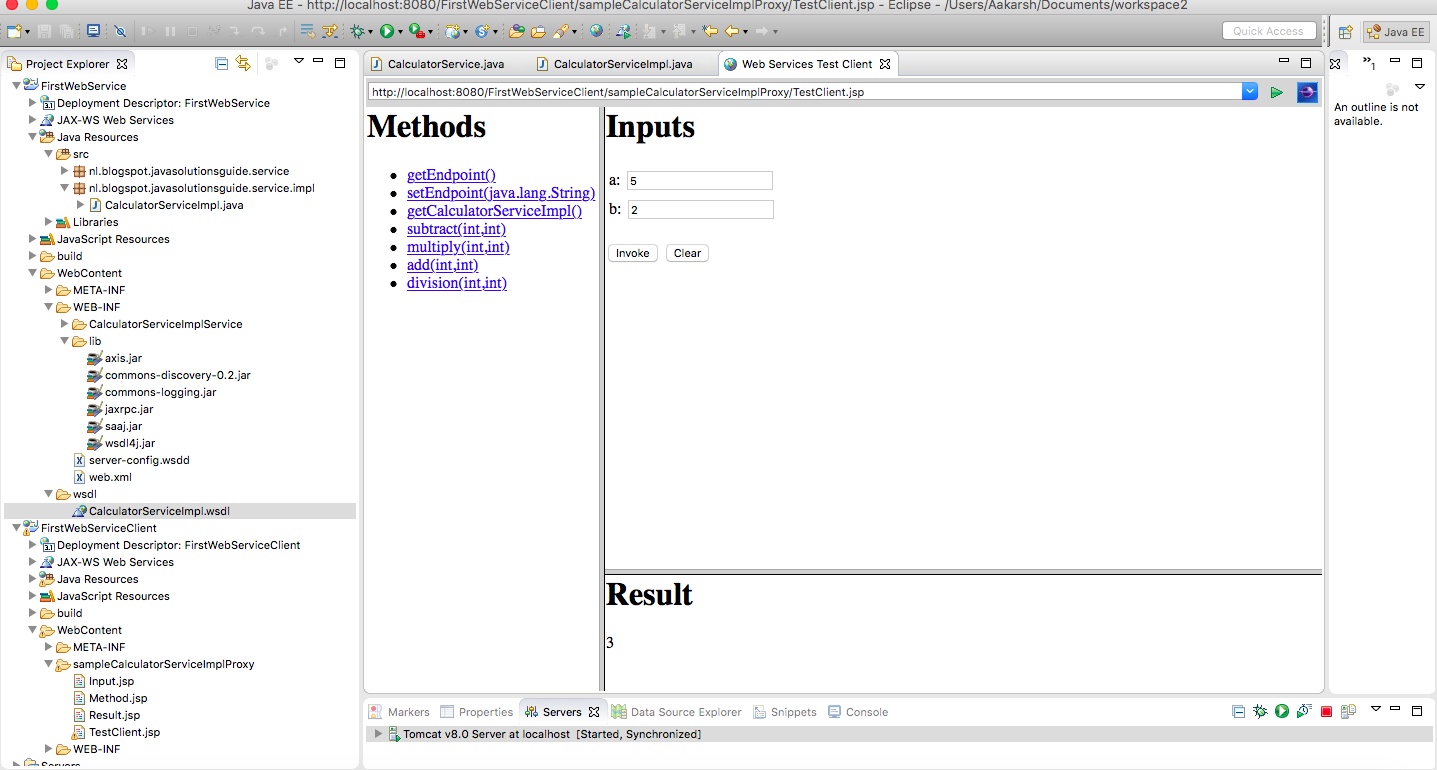
12) To test web service,subtract functionality,click on subtract link in above screenshot.we will get following screen,where we can enter our inputs.

13) Enter any input to test in two text boxes and click on invoke.This will invoke web service and we will be able to see result in "Result" section as can be seen in below screenshot.
14) If we want to debug the code of our web service,we can restart the server in Debug mode and put breakpoint in CalculatorServiceImpl's method which we want to debug and can invoke subtract again from TestClient.jsp
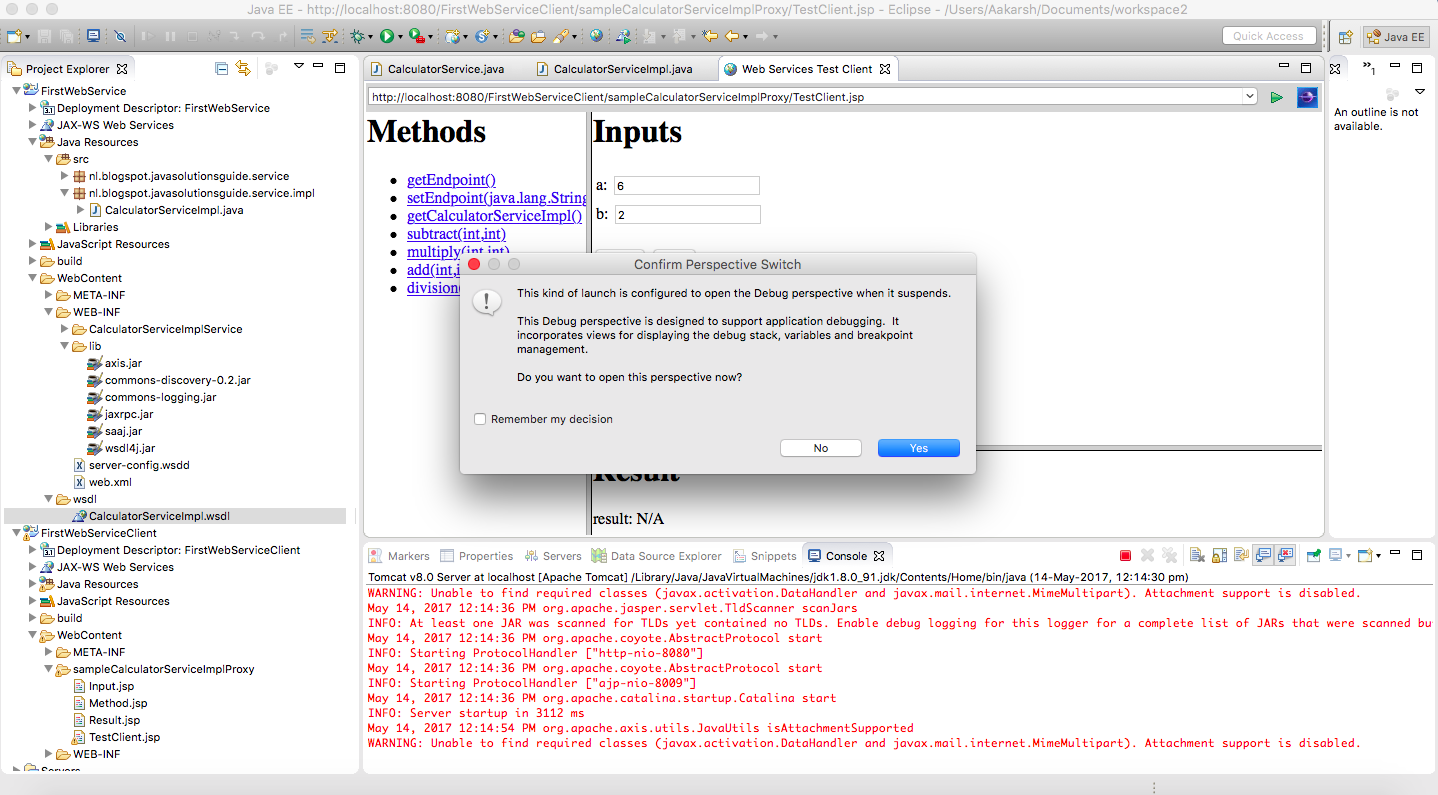
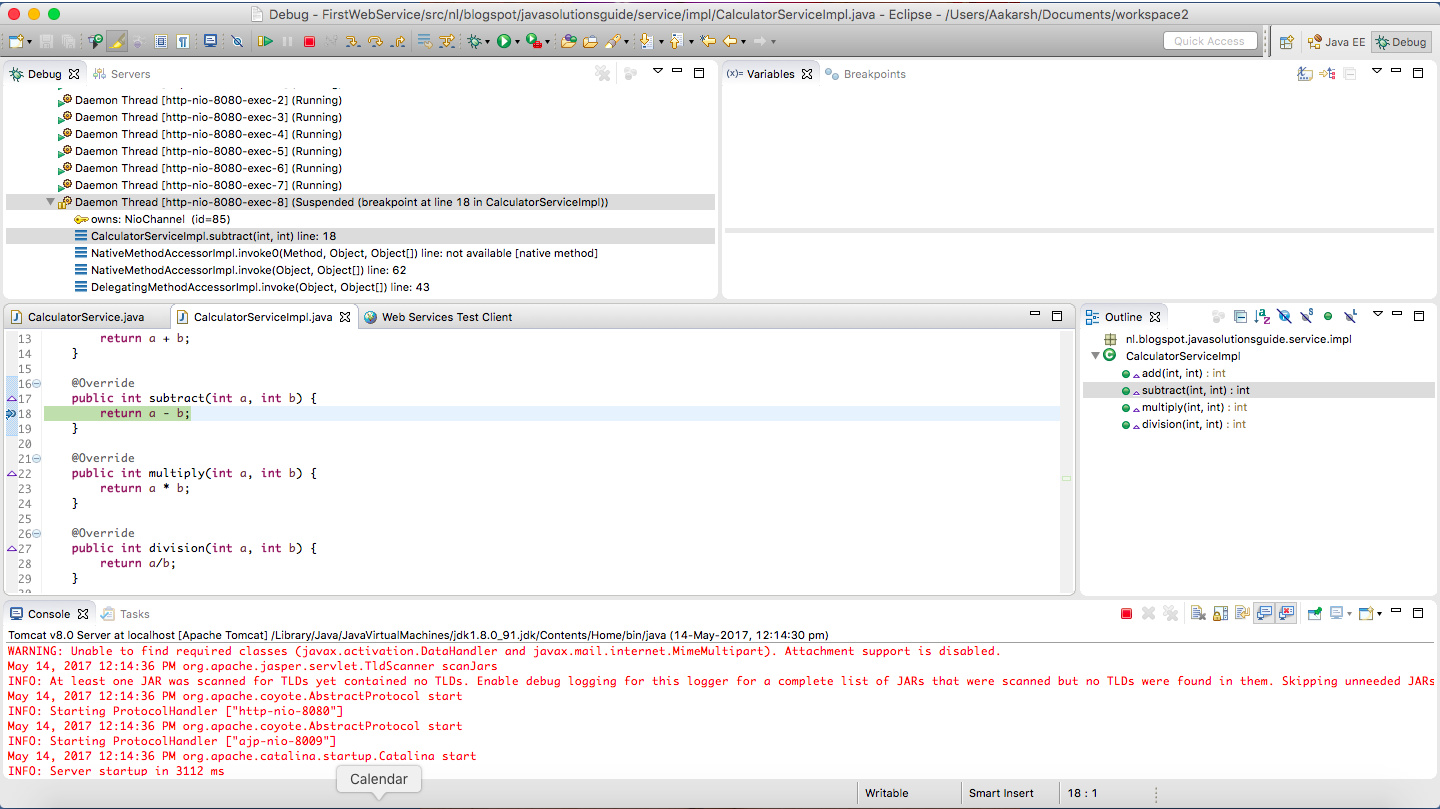
15) Click on Yes,and you will be in Subtract method for debugging as below :
Thats it.With this we saw how to create Soap Web Service in Java.
Thanks for reading.Please let me know,if you face any issue during implementation.
In this tutorial,we will learn how to create Soap based Web Services in Java language.
Before we deep dive into that,let us understand what Web Service is actually.
Web Service = Web + Service
Web Service as its name implies is service provided over web.
After this definition, immediate question that comes to mind is that we have lot of web sites available which provides services to its clients/users over web,so are all these web sites which provides services over web/Internet are Web Services?
Answer is NO.
Web services are created to be consumed by the applications i.e. there will be some application code which will call(consume) web service(some method of web service) to use the functionality of the web service.
Example : Say I have my web application and on the home page of my application,I want to display Weather conditions(Temperature) ,then I can call web service which expose operation(method) to fetch Weather specific data from my web application and display the data on my web application.
Web applications are for human consumption via browser.
Example : Facebook,LinkedIn,Yahoo.
Let us see below steps to create Soap based web Service :
1) Create dynamic Web Project in Eclipse by right clicking in Project explorer and then select New-> Dynamic Web Project

2)
2.1) Give any name to project ,for example "FirstWebService".
2.2) Select Target Runtime as Apache Tomcat v8.0.
Note : You can use some other version of Tomcat as well or some other Servlet container as well.
2.3) Click Finish.
3) Below is how project structure will look like in Eclipse.

4)
4.1 Create a package within src folder with name nl.blogspot.javasolutionsguide.service by right clicking on src folder and then select New -> Package.
4.2 Within this package create a interface with name CalculatorService by right clicking on package name and then selecting New-> Interface
package nl.blogspot.javasolutionsguide.service;

/**
 * @author JavaSolutionsGuide
 *
 */
public interface CalculatorService {

}
4.3 Add methods in CalculatorService ,which will be the operations exposed by this web service or in other words these will be the operations which client/consumer of this web service can expect from this web service.
package nl.blogspot.javasolutionsguide.service;

/**
 * @author JavaSolutionsGuide
 *
 */
public interface CalculatorService {

 public int add(int a,int b);

 public int subtract(int a,int b);

 public int multiply(int a, int b);

 public int division(int a,int b);

}
4.3 Create another package within src folder with name nl.blogspot.javasolutionsguide.service.impl
4.4 Create class with name CalculatorServiceImpl which should implement CalculatorService interface.
/**
 * @author JavaSolutionsGuide
 *
 */
public class CalculatorServiceImpl implements CalculatorService{

 @Override
 public int add(int a, int b) {
  return a + b;
 }

 @Override
 public int subtract(int a, int b) {
  return a - b;
 }

 @Override
 public int multiply(int a, int b) {
  return a * b;
 }

 @Override
 public int division(int a, int b) {
  return a/b;
 }

}
5) Right click on CalculatorServiceImpl file and select Web Services -> Create Web Services
6) You will see following wizard.
As you can see,in the "web service type",we have chosen "Bottom up Java bean Web Service",which means we will create Java code having implementation first and from that we will generate contract i.e. WSDL,which then can be shared with consumer of the web service.In another approach which is "Top down Java bean Web Service" approach ,first WSDL is created and then Implementation is created.
In the Service Implementation,give the name of CalculatorServiceImpl class which we created above.
Also make sure that In the web Service section and Client type section,slider is completely on left ,which means we want to get all steps performed for web service from Develop Service -> Assemble Service -> Deploy Service ->Install Service ->Test Service and all following steps for web service client from Develop Client -> Assemble Client -> Deploy Client -> Install Client-> Start Client ->Test Client.
Click Next.
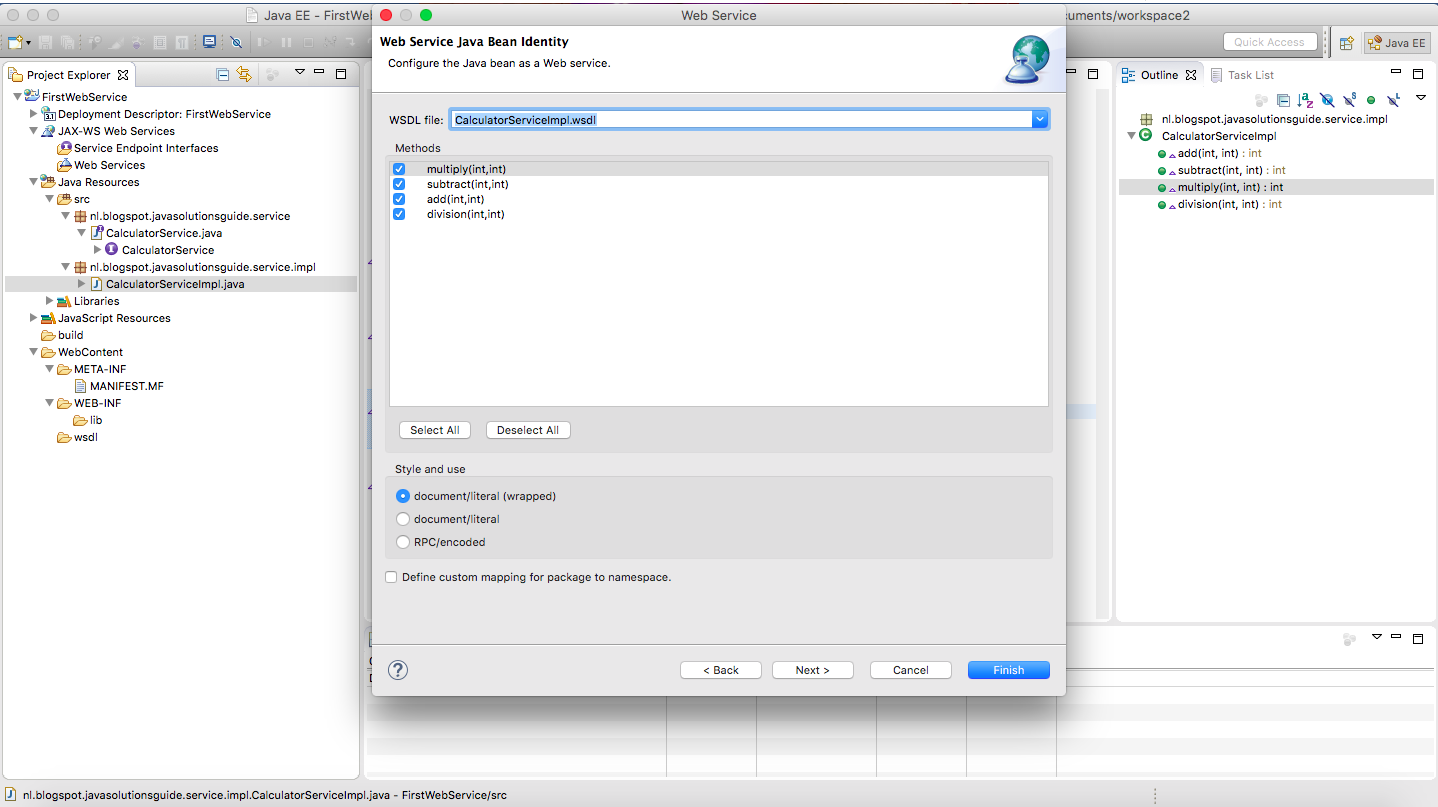
7) You will get following screen,wherein you can select which methods of CalculatorServiceImpl class you want to expose.By default all the methods within class will be selected as can be seen in below screenshot.Click on Next,as here we will expose all methods of CalculatorServiceImpl class.
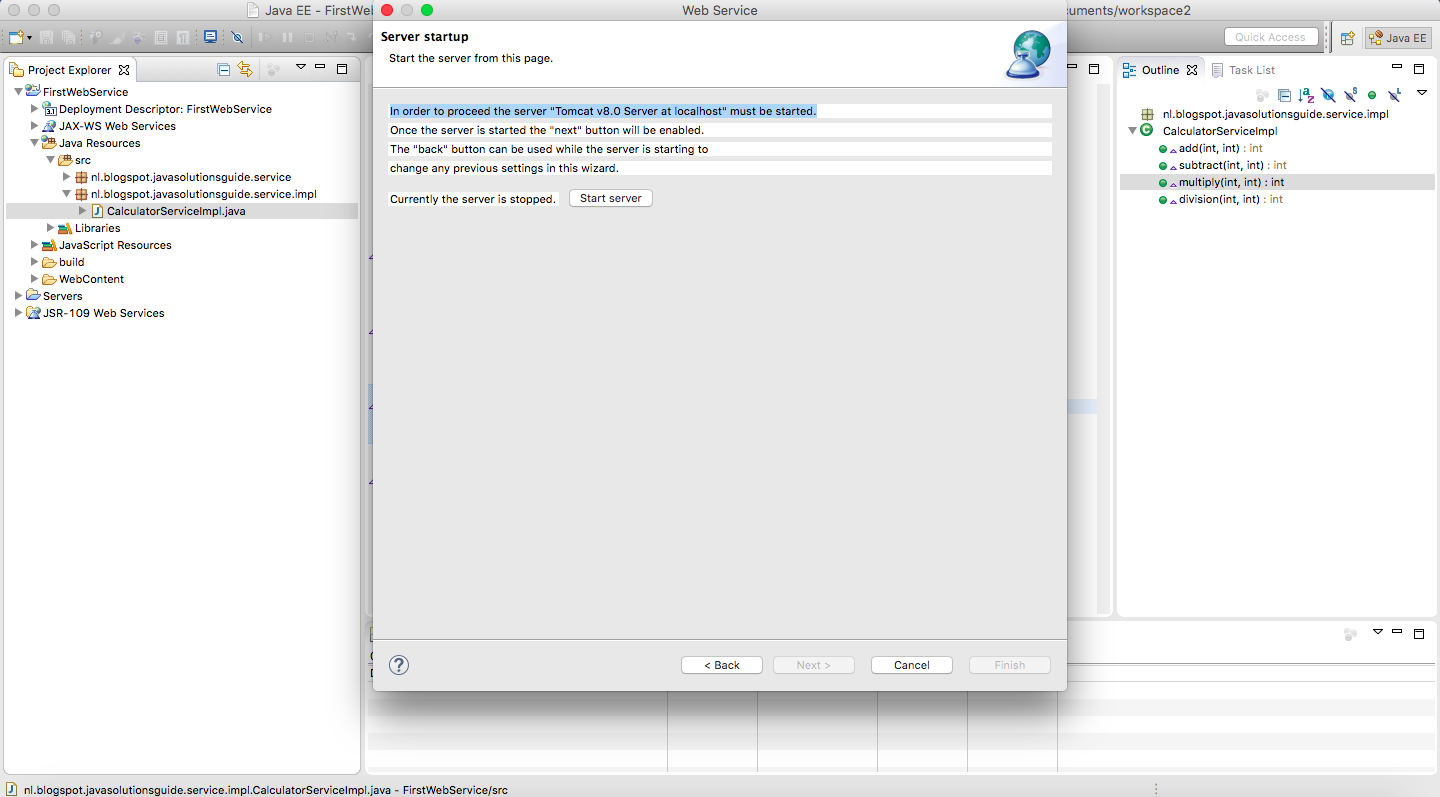
8) You will get following screen.Click on Start Server.
10).As you can see in below screenshot,a new Web Service Client project with name "FirstWebServiceClient" has been automatically created(because in Client type section in step 6 ,we had moved slider to left most ,which means we want to get client created automatically (to test web service using that client) and deployed on Tomcat server along with Web service "FirstWebService".
11)Also You will see that eclipse has added WSDL,Axis and few more jars.Here Axis is nothing but one of the implementation of java Web Services specifications.
Now What is this WSDL.
WSDL stands for Web Service Description Language.
As its name implies,this file describes web service.It tells what all methods are there in web service (calculatorServiceImpl class in our case) and what type of input parameters they expect and what are there return types.
The Service creator needs to share this WSDL to service consumer,so that service consumer will get to know which methods of service can be called and what type of input parameter consumer needs to send and what return type they can expect.Accordingly consumer will call service methods of exposed web service.Here for example purpose,we have created both Web Service and Consumer,but in real life ,normally ,we will either be provider or consumer of the web service at a time.
12) To test web service,subtract functionality,click on subtract link in above screenshot.we will get following screen,where we can enter our inputs.
13) Enter any input to test in two text boxes and click on invoke.This will invoke web service and we will be able to see result in "Result" section as can be seen in below screenshot.
14) If we want to debug the code of our web service,we can restart the server in Debug mode and put breakpoint in CalculatorServiceImpl's method which we want to debug and can invoke subtract again from TestClient.jsp
15) Click on Yes,and you will be in Subtract method for debugging as below :
Thats it.With this we saw how to create Soap Web Service in Java.
Thanks for reading.Please let me know,if you face any issue during implementation.


